Fast Forward to Summer and Smoking a Tri-Tip

Oh my!  Where has the time gone?  My last post was dated July 8, 2012!  Life and new hobbies have gotten in the way.  What happened, you ask?  It all started in the Fall of 2012 when I went to Verona, WI, for a work conference and was challenged by a coworker to climb a rock wall.  I did it.  I lost.  And I was hooked!  My partner and I found an amazing local rock climbing gym and made it our second home.  We train indoors and climb all around Yosemite National Park.  It’s pretty spectacular to have Yosemite as our backyard.  Yosemite has been our oyster.  I have discovered how wonderful it is to be outdoors, to be one with nature.  There is something very meditative to be outdoors, touching granite and taking in the smell of sugar pines.  Suffice it to say, cooking and blogging took a back seat.

IMG_2865

I’m not exactly sure why I’m at home right now and not in Yosemite!  The “winter” weather has been mild around here, and albeit sad, it has made it pretty perfect conditions to climb outdoors.  But I woke up this morning and felt like smoking a tri-tip on my Big Green Egg.  The morning was beautiful, but it quickly warmed up to the high 80s/low 90s.  Sigh.  I think the first day of Spring is nearing us, but unfortunately, it seems that we skipped Spring and went straight to Summer.

smokedtritip1

Smoked Tri-Tip

For dry rub:

1 cup brown sugar
2 tablespoons kosher salt
2 tablespoons smoked paprika
1 tablespoons garlic powder
1 tablespoon onion powder
1/2 tablespoon chili powder
1/2 tablespoon cayenne
1 tablespoon freshly ground black pepper
1 teaspoon ground sage
1 teaspoon dried marjoram
1 teaspoon cumin

2-3 pound beef loin tri-tip roast, fat cap trimmed to 1/4 inch
Wood chips, soaked in water for at least 30 minutes

Remove the tri-tip from the refrigerator, and pat the brisket dry with a paper towel. Rub the dry rub over the brisket until well coated. Set aside.

Heat the Big Green Egg (or smoker of your choice) until it reaches a stable temperature of 225 degrees F. Add the wood chips when the coals are hot. Place a disposable drip pan underneath the brisket. Cook the brisket, fat side up, until the internal temperature is 130 degrees F (medium rare).

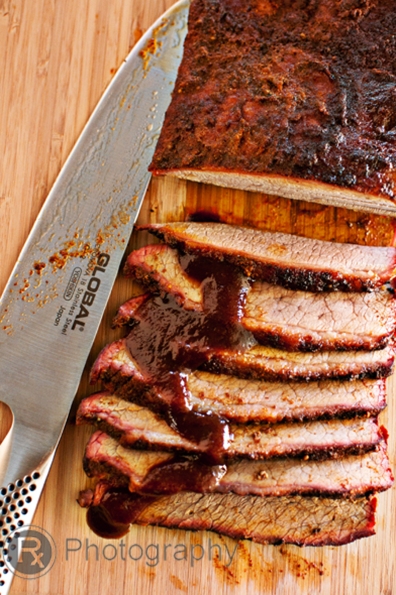
Remove from the smoker, and let it rest for about 5 minutes.  When ready to eat, slice against the grain and serve with your favorite barbecue sauce.

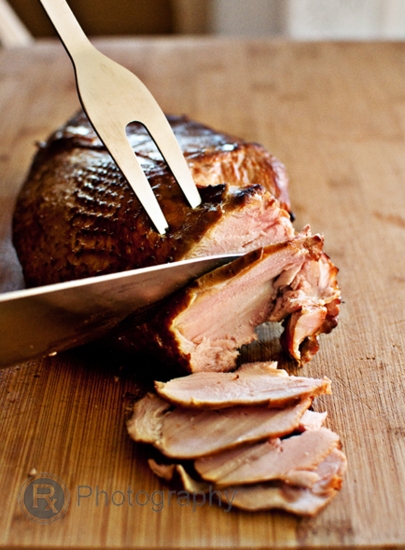
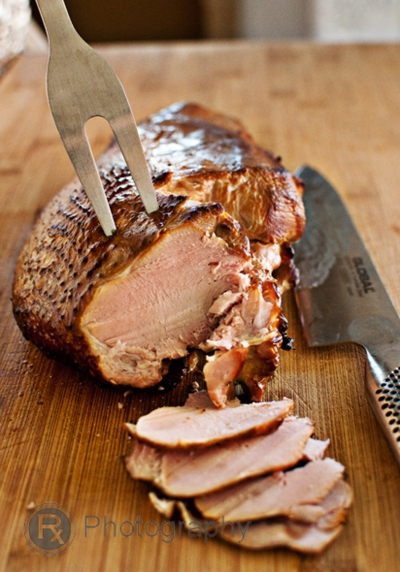
Maple Brined, Apple Wood Smoked Turkey Breast on the Big Green Egg

It was really hot today.  And by hot, I mean 100+ degrees F outside.  In fact, it’s supposed to be in the high 100s  and mid-70s at night for the next five days.  That’s a whole lot of ridiculousness.  Yuck.  So my goal for the next week is to not use the kitchen.  At all.  Okay, so that’s a slight exaggeration.  I’d like to not turn on the stove or oven.  The PG&E bill is already going to be out of control.  I’m scared.  But I digress.

So to continue on with smoking some more meat, I threw on a maple-brined turkey breast while my brisket was also smoking.  Uhm.  Oh.  Holy.  Chopsticks.  Why haven’t I ever smoked a turkey breast, let alone a turkey before?!  The smell and taste of the smoked turkey was intoxicating.  It was just pure deliciousness.  I am now a firm believer that turkey should never be consumed unless smoked.  Tomorrow, sandwiches.  Thanksgiving, here we come!

Maple Brined, Apple Wood Smoked Turkey Breast on the Big Green Egg

1 (4 pound) turkey breast, bone-in
6 bay leaves, rinsed
6 sprigs thyme, rinsed
6 sage leaves, rinsed and slightly bruised
1 carrot, diced
1 small to medium white onion, diced
1 cup good quality maple syrup
1/3 cup brown sugar
1 head garlic, 1/4 inch cut off from the top
1/2 cup salt
2 tablespoons whole black peppercorns, slightly crushed
Applewood chips, soaked for at least 30 minutes

Place turkey breast in a large stock pot, and add just enough water to cover. Place all ingredients into the stock pot, and stir until well incorporated. Cover and refrigerate for at least 12 to 24 hours.

Heat the Big Green Egg (or smoker of your choice) until it reaches a stable temperature of 225 degrees F. Add the wood chips when the coals are hot. Place a disposable drip pan underneath the turkey. Cook the turkey, skin side up, until the internal temperature is 160 degrees F (about 1 hour per pound).

Remove from the smoker, wrap with foil, and place in an empty ice chest to allow the juices to redistribute.

Slice and serve.

Smoked Brisket on the Big Green Egg

It’s been a while since I’ve fired up the Big Green Egg, and not to mention, my blog.  I have no excuses.  Just pure laziness.  Oh, actually, I do have one excuse.  I’ve been cheating on my blog with my newly upgraded and sexy ukulele.   She’s a beautiful, solid koa wood concert ukulele, made in Hawai’i.  She is definitely bright and sassy!  We’ve been playing The Muppet’s Rainbow Connection together.  I wonder what we’ll play next?

I finally got the creative itch to cook something on the Big Green Egg.  My original goal was to smoke a brisket on July 4th, but I just never got around to buying the brisket.  This time I wasn’t going to let laziness or my ukulele get in the way.  I bought an insane amount of meat yesterday in preparation for grilling and smoking today.  Today was a good day.

Smoked Brisket

For dry rub:
1 cup brown sugar
2 tablespoons kosher salt
2 tablespoons smoked paprika
1 tablespoons garlic powder
1 tablespoon onion powder
1/2 tablespoon chili powder
1/2 tablespoon cayenne
1 tablespoon freshly ground black pepper
1 teaspoon ground sage
1 teaspoon dried marjoram
1 teaspoon cumin

7-8 pound brisket, fat cap trimmed to 1/4 inch
Wood chips, soaked in water for at least 30 minutes

Remove the brisket from the refrigerator and allow it to come to room temperature, about one hour. Pat the brisket dry with a paper towel. Rub the dry rub over the brisket until well coated. Set aside.

Heat the Big Green Egg (or smoker of your choice) until it reaches a stable temperature of 225 degrees F. Add the wood chips when the coals are hot. Place a disposable drip pan underneath the brisket. Cook the brisket, fat side up, until the internal temperature is 150 degrees F (about 1 hour and 15 minutes per pound). Baste the brisket with a few sprays of apple juice after 3 hours on the smoker to keep it moist.

Remove from the smoker, and wrap tightly with foil. Cook at the same temperature until internal temperature is 185 degrees F (about 3 to 4 hours).

Once the brisket is done, put the brisket in an insulated ice chest lined with aluminum foil. Close it for at least one hour for the juices to redistribute. The meat will hold its heat for hours in the chest, and the brisket will become even more tender. I do not suggest leaving the brisket in the cooler for more than 3 hours to prevent bacteria growth.

When ready to eat, slice against the grain and serve.

Top Ten Reasons to Stay Up Late with a Pharmacist and a Prescription for Vegan, Gluten-Free, and Raw Almond Joy Larabars

Top Ten Reasons to Stay Up Late with a Pharmacist

1. Pharmacists can do more than lick and stick.
2. Pharmacists have a long duration of action.
3. Pharmacists Rx rated.
4. Pharmacists find new routes of administration.
5. Pharmacists do it over the counter.
6. Pharmacists are patient lovers.
7. Pharmacists accept third parties.
8. Pharmacists have a quick reconstitution time.
9. Pharmacists do it without breaks.
10. You will want no substitution.

[Kinda funny or kinda geeky? Or maybe only pharmacists find this funny because we’re so geeky? :)]

So do you love Almond Joys but hate that all that fake, processed chocolate and sugar?  Or tired of spending well over a dollar for one measly Larabar?  Well, go buy the ingredients or bring them out of your kitchen pantry and give this prescription a try.  And if you have this prescription filled now, you’ll get homemade Larabars within less than a few hours.  No wait times, and no pharmacist consultations. So what are you waiting for?  Stop gawking at food porn and make some of these already.  Go on.

Vegan, Gluten-Free, and Raw Almond Joy Larabars

4 cups medjool dates, pitted
2 cups raw almonds
1 cup vegan chocolate chips
1 cup shredded coconut
4 tablespoons chia seeds (optional)

Soak the medjool dates in warm water for 30 minutes. Drain and set aside.

Add the soaked dates, raw almonds, cacao chips, shredded coconut, and chia seeds into a food processor. Pulse until no chunks remain. Scrape the bowl down if it begins to clump. [This required a lot of patience. I may process the raw almonds first separately, followed by the cacao chips until coarsely ground. Then the medjool dates so it is not so chunky.]

Line a 9×13 inch pan with parchment paper. Press the mixture into the pan using your hands and/or spatula.

Refrigerate for 2 hours for it to set. Slice into desired size and store in an air-tight container in the refrigerator.  [This recipe yields delicious homemade Larabars that are simply to die for.    You won’t want to freeze them.  I know because, well, I came up with ridiculously amazing concoction :)]

Vegan and Gluten-Free Miso Soup with Tofu and Wakame

When I think of Japanese food, I think of a carnivorous feast full of sashimi, nigiri, and sushi rolls; chicken or pork tonkatsu; chicken, beef, or salmon teriyaki; porky udons; and much, much more.  Everything but vegan.  Six months ago, I would have snubbed at the idea of a vegan Japanese meal.  I would have thought, “such a sad waste of calories” at that time.

Interestingly, since I’ve made the decision to eat less meat, and more veggies, my palate has become more open-minded to vegan and vegetarian fare.  I seek out vegan or vegetarian restaurants when I’m traveling.  We recently visited the East Bay and headed to the Gourmet Ghetto (aka, Berkeley) for some vegan/vegetarian Japanese food at Cha-Ya.  I have to admit, I was still a little hesitant about vegan Japanese food because I had some doubts that it was going to be as good as your traditional Japanese meal.  We ordered miso soup; sunomono; udon with vegetable tempura; and pickled burdock and pickled melon sushi rolls, and a seaweed salad sushi roll.

The dinner was ridiculously amazing and filling!  I was really surprised at how much I enjoyed it, and how much I look forward to going back.  What stood out the most was the simple but savory miso soup that oozed with umami.  Oh.  My.  Word.  It was just delightful.  I like a good miso soup, and I order it just about every time we dine at a Japanese restaurant.  Most places are either too salty or too stingy with the tofu and wakame.  I can honestly say that Cha-Ya offers some of the best miso soup.

I left Cha-Ya feeling inspired to cook up some vegan Japanese food at home.  I started with a vegan miso soup.  It turned out pretty good… it’s definitely a close second to Cha-Ya’s 🙂

Miso Soup with Tofu and Wakame

6 cups vegan dashi (6 cups of water + 12 inch piece of kombu soaked overnight)
3-4 tablespoons gluten-free red miso paste
1-2 tablespoon gluten-free white miso paste
1 block firm tofu (fresh if possible), drained and cubed
2 tablespoons wakame, soaked in water for 5 minutes, drained and roughly chopped
1/4 cup green onion, chopped

When ready to make the soup, bring the vegan dashi up to a simmer (not a full boil), then take out the kombu. Bring to a full boil, and then add the wakame and simmer for one minute.

Place a small strainer over the broth. Add the miso [a little bit at a time to your preference, since miso varies in saltiness] by dissolving and pushing through the strainer. [The strainer helps to avoid a lumpy miso soup. Lastly, do not boil the miso or else you risk ruining the miso flavor.] Add the tofu and green onion.

Serve immediately.