Maple Brined, Apple Wood Smoked Turkey Breast on the Big Green Egg

It was really hot today.  And by hot, I mean 100+ degrees F outside.  In fact, it’s supposed to be in the high 100s  and mid-70s at night for the next five days.  That’s a whole lot of ridiculousness.  Yuck.  So my goal for the next week is to not use the kitchen.  At all.  Okay, so that’s a slight exaggeration.  I’d like to not turn on the stove or oven.  The PG&E bill is already going to be out of control.  I’m scared.  But I digress.

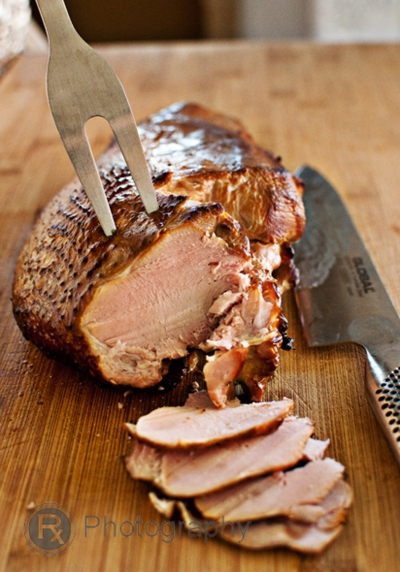
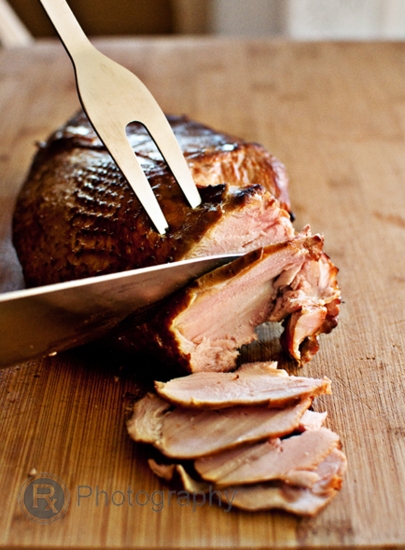
So to continue on with smoking some more meat, I threw on a maple-brined turkey breast while my brisket was also smoking.  Uhm.  Oh.  Holy.  Chopsticks.  Why haven’t I ever smoked a turkey breast, let alone a turkey before?!  The smell and taste of the smoked turkey was intoxicating.  It was just pure deliciousness.  I am now a firm believer that turkey should never be consumed unless smoked.  Tomorrow, sandwiches.  Thanksgiving, here we come!

Maple Brined, Apple Wood Smoked Turkey Breast on the Big Green Egg

1 (4 pound) turkey breast, bone-in
6 bay leaves, rinsed
6 sprigs thyme, rinsed
6 sage leaves, rinsed and slightly bruised
1 carrot, diced
1 small to medium white onion, diced
1 cup good quality maple syrup
1/3 cup brown sugar
1 head garlic, 1/4 inch cut off from the top
1/2 cup salt
2 tablespoons whole black peppercorns, slightly crushed
Applewood chips, soaked for at least 30 minutes

Place turkey breast in a large stock pot, and add just enough water to cover. Place all ingredients into the stock pot, and stir until well incorporated. Cover and refrigerate for at least 12 to 24 hours.

Heat the Big Green Egg (or smoker of your choice) until it reaches a stable temperature of 225 degrees F. Add the wood chips when the coals are hot. Place a disposable drip pan underneath the turkey. Cook the turkey, skin side up, until the internal temperature is 160 degrees F (about 1 hour per pound).

Remove from the smoker, wrap with foil, and place in an empty ice chest to allow the juices to redistribute.

Slice and serve.
Smoked Brisket on the Big Green Egg

It’s been a while since I’ve fired up the Big Green Egg, and not to mention, my blog.  I have no excuses.  Just pure laziness.  Oh, actually, I do have one excuse.  I’ve been cheating on my blog with my newly upgraded and sexy ukulele.   She’s a beautiful, solid koa wood concert ukulele, made in Hawai’i.  She is definitely bright and sassy!  We’ve been playing The Muppet’s Rainbow Connection together.  I wonder what we’ll play next?

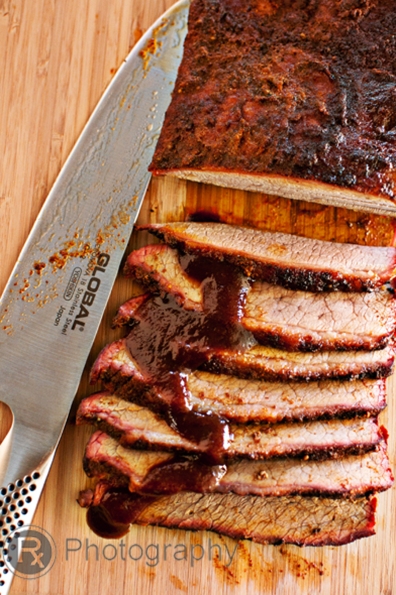
I finally got the creative itch to cook something on the Big Green Egg.  My original goal was to smoke a brisket on July 4th, but I just never got around to buying the brisket.  This time I wasn’t going to let laziness or my ukulele get in the way.  I bought an insane amount of meat yesterday in preparation for grilling and smoking today.  Today was a good day.

Smoked Brisket

For dry rub:
1 cup brown sugar
2 tablespoons kosher salt
2 tablespoons smoked paprika
1 tablespoons garlic powder
1 tablespoon onion powder
1/2 tablespoon chili powder
1/2 tablespoon cayenne
1 tablespoon freshly ground black pepper
1 teaspoon ground sage
1 teaspoon dried marjoram
1 teaspoon cumin

7-8 pound brisket, fat cap trimmed to 1/4 inch
Wood chips, soaked in water for at least 30 minutes

Remove the brisket from the refrigerator and allow it to come to room temperature, about one hour. Pat the brisket dry with a paper towel. Rub the dry rub over the brisket until well coated. Set aside.

Heat the Big Green Egg (or smoker of your choice) until it reaches a stable temperature of 225 degrees F. Add the wood chips when the coals are hot. Place a disposable drip pan underneath the brisket. Cook the brisket, fat side up, until the internal temperature is 150 degrees F (about 1 hour and 15 minutes per pound). Baste the brisket with a few sprays of apple juice after 3 hours on the smoker to keep it moist.

Remove from the smoker, and wrap tightly with foil. Cook at the same temperature until internal temperature is 185 degrees F (about 3 to 4 hours).

Once the brisket is done, put the brisket in an insulated ice chest lined with aluminum foil. Close it for at least one hour for the juices to redistribute. The meat will hold its heat for hours in the chest, and the brisket will become even more tender. I do not suggest leaving the brisket in the cooler for more than 3 hours to prevent bacteria growth.

When ready to eat, slice against the grain and serve.

Vietnamese Grilled Lemongrass Pork Chop… it’s porky goodness!

It was 99 degrees F outside today, and it’s only the middle of May.  Mother Nature, you are being cruel to us.  I love when you are around the 70s to mid-80s, because that’s what you are during the months of April and May.  In fact, that’s my favorite time of the year here.  So what gives?  Is this a taste of what is to come this summer?  Please be kind.  I can’t bear sizzling temperatures near/over 110 degrees F.

I couldn’t bear to cook in the house today.  We cooked in yesterday, although it was 93 degrees F outside, our house seemed like a sauna.  I suppose we could have turned on the air conditioner, but I just couldn’t bring myself to do that because it is only May.  But I digress.  It was the perfect to take the cooking outdoors, and I’ll take any excuse to play, I mean, cook on my Big Green Egg.

Vietnamese Grilled Lemongrass Pork Chop (adapted from Viet World Kitchen)

4 pork chops, bone-in, about 1 inch thick
3 tablespoons sugar
3 tablespoons garlic
3 tablespoons shallot
1 1/2 stalks lemongrass, trimmed and roughly chopped
1/2 teaspoon fresh ground black pepper
1 1/2 tablespoons dark soy sauce
2 tablespoons fish sauce
2 tablespoons olive oil

Using a mini food processor, pulse the sugar, garlic, shallot, and lemongrass to a mince-like texture. Add the pepper, soy sauce, fish sauce, and oil, and process to combine well.

Place the pork chops in a large zip-lock bag, and pour the marinade to coat. Squish the marinade around to coat the pork chops evenly. Refrigerate for at least 6 hours, up to 24 hours. Allow the pork chops to rest at room temperature, about 30-45 minutes, before grilling.

Preheat the Big Green Egg (or any grill) to 550 degrees F (or medium-high heat). Grill the pork chops over direct high heat, with the lid closed as much as possible, about 4 minutes. Flip, and cook for an additional Place the chops on the grill rack of your Big Green Egg. Sear the chops for about 4 minutes, flip, and cook for an additional 4 minutes, or until internal temperature reaches 150 degrees F. Remove from the grill, and let the pork chops rest for 5 minutes.

My favorite way to eat these delicious pork chops is over steamed white rice with a fried egg, and nuoc cham dipping sauce.  Yum.

Makes 4 servings.

Grilled Shrimp and Corn Salad with Avocado

I need to read more.  I feel well-informed of current affairs from reading various news media, but I don’t read enough books.  I used to love thumbing through books, especially historical fiction novels that had something to do with China and Mao’s Cultural Revolution.  Now I spend the majority of my day at work staring at a computer screen, only to come home to stare at a computer screen perusing through different food-related websites, my blog, and anything else of interest.  And then there’s the television.  I’m addicted to my television.  How pathetic, right?  I love my Bravo station.  Real Housewives of Atlanta, Beverly Hills, New Jersey, New York, and Orange County?  Yes, please!

The sad thing is that I can’t even remember the last time I picked up a book for leisure.  I even bought myself and my partner a Kindle in hopes that it would encourage me to buy books on-the-fly to read, but instead, it sits on my nightstand collecting dust.  At least my partner uses her Kindle and puts it to good use.  She has finished three books in a matter of three days, and working on a new book as we speak, while I sit here lazily on the couch, blogging, watching a recorded show of The Voice, and perusing through Food Gawker and Tastespotting.

Maybe I should finish this blog post and pick up my Kindle 🙂

Any good book suggestions?  What about Michael Pollan’s In Defense of Food: An Eater’s Manifesto?

Grilled Shrimp Salad with Grilled Corn and Avocado (adapted from Epicurious)

1 pound large shrimp
1 large ear of corn, husked
2 lemons, halved
1/2 cup canned black beans, drained
6 cups romaine lettuce, chopped
1 avocado, sliced
Salt and pepper

5 tablespoons orange juice
3 tablespoons lemon juice from grilled lemon
2 tablespoons fresh chives, chopped
1 1/2 teaspoons grated orange peel
1/4 cup olive oil
1/2 teaspoon truffle oil
Salt and pepper, to taste

Preheat grill to medium-high heat.

Butterfly the shrimps by slicing almost through lengthwise, while leaving the shell on shrimp. Devein the shrimp, if necessary. Toss with olive oil, juice of one lemon, and season with salt and pepper.

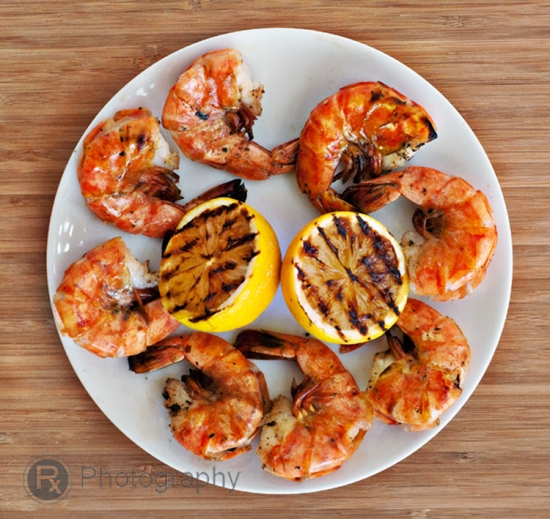
Place the lemons, corn, and shrimp on the grill. Grill the shrimp two minutes on each side, until the shells are pink and the shrimp opaque; the lemons for about one minute, or until there are charred grill marks to caramelize the sugars of the lemon; and the corn has also developed charred grill marks around the diameter of the corn.

Combine all of the ingredients for the dressing in a small bowl. Season with salt and pepper. Set aside.

When cool to handle, cut the kernels off the corn cob in a shallow bowl, and peel the shrimp. Arrange the lettuce on two plates or bowls [however, you like to serve your salad], layered with corn, black beans, avocado, and shrimp. Divide dressing between two plates. [You could toss the salad with the dressing instead. I think the salad looks “prettier” when arranged this way.]

Makes 2 servings.

Grilled Salmon Burgers with Cream Cheese and Pickled Red Onion

I was craving lox and bagels schmeared with cream cheese, capers, and pickled red onions from this food stand at the SF Ferry Building Farmer’s Market, but I was also craving a salmon burger.  So I thought I’d combine the two into one and created a salmon burger with cream cheese.  It was the perfect compromise 🙂

Grilled Salmon Burgers with Cream Cheese and Pickled Red Onion (pickled red onion adapted from Rick Bayless’ Authentic Mexican)

1 1/2 pounds fresh wild salmon, skinned
1 tablespoon lemon juice
Salt and pepper
Extra virgin olive oil, for drizzling
1 large tomato, sliced
1/2 cup cream cheese
2 tablespoons capers
4 crusty, hamburger buns, lightly toasted
1 large red onion, thinly sliced
1 cup apple cider vinegar
1 teaspoon salt

Preheat outdoor grill to medium high heat. [You can also cook this indoors on a skillet.]

In a small bowl, combine the cream cheese and capers. Mix thoroughly, and set aside.

Blanch sliced red onions in a small saucepan of boiling water (enough to cover the onions) for about 30 seconds, and drain in a colander.

Return them to the saucepan, and add the cider vinegar, 1 teaspoon salt, and just enough cold water to cover the onions.  Bring to a boil over high heat and simmer the onions for 1 minute.

Transfer the onions and brine to a glass jar and chill.  The onions will turn pink and will get crisp as they cool.  This can be stored in the refrigerator for about 2 weeks.  [This process can be done a few days ahead if pressed for time.]

Finely chop the salmon into 1/4-inch dices and place into a medium size mixing bowl. Add to it the lemon juice, salt, and pepper. Mix thoroughly to combine. Form 4 patties, and drizzle each with extra virgin olive oil. Flip and repeat. [I prefer the chunkier texture of salmon. Conversely, you could also cut the salmon into large chunks and throw it into a food processor and pulse to a coarse grind meat.]

Cook the burgers for 3 to 3 1/2 minutes or 4 to 5 minutes on each side, for medium or well-done, respectively.

Arrange the burgers with sliced tomatoes, pickled red onions, and caper-cream cheese slathered onto your favorite hamburger bun.